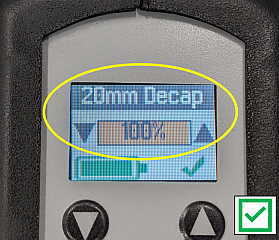
Your vial's cap is loose or deformed?
Many crimping and de-capping problems can be solved by two very general suggestions:
- Verify the cap is properly crimped
- Adjust the electronic crimper/de-capper as necessary
Verify the cap is properly crimped
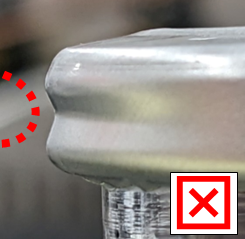
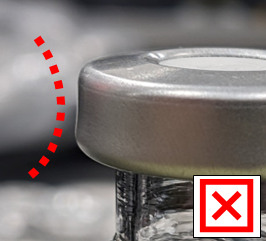
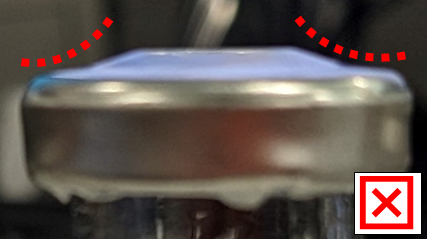
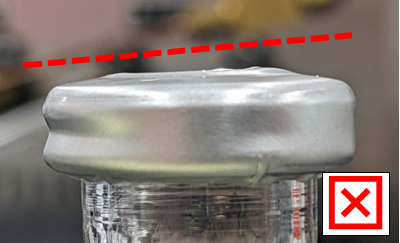
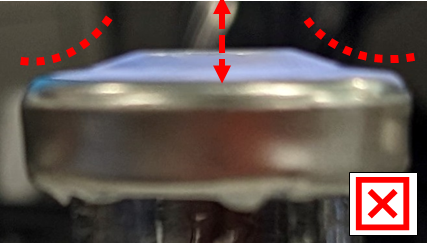
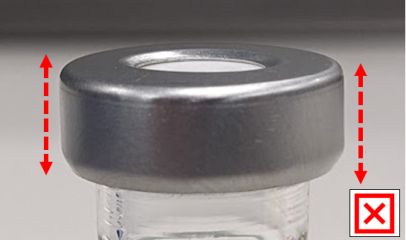
The tighter you crimp your caps the more they can be deformed by over-crimping (more is not better!) It also will be a lot more difficult to de-cap those deformed caps, because buckled rims and raised centers reduce the ability for the de-capper jaws to firmly grip the cap and remove it.
|
Cap with excessively buckled rim |
Cap with slightly buckled rim |
Cap with raised center |
 |
 |
 |
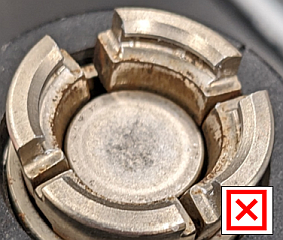
Over-crimping or exposure to corrosives may cause premature wear
Crimper jaws are made of plated and hardened stainless steel designed to last for over a million normal crimping cycles. Constant over-crimping may cause premature wear and contact with corrosive chemicals may damage the jaws’ finish.
Both wear and corrosion will increase the friction in the system, causing the jaws to stick or crimp inconsistently. Wiping the jaws clean with a neutralizing solution after use should prevent corrosion.
Over-crimping may cause leaks
A septum can be squeezed so tightly by an over-crimped cap that it causes a leak.
Buckled caps do not provide an even sealing pressure uniformly around a septum.
Caps having raised centers due to over-crimping are more likely to allow the septum to push through and dislodge from the cap once the vial is pressurized and septum is punctured by the sample probe.
All septum materials expand with temperature, so all seals will get tighter once heated in the headspace oven. Even caps which are only slightly over-crimped can experience sealing problems once the septum expands in the oven.
|
Cap Buckled Rim Does Not Seal Uniformly |
Cap Raised Center Allows Septum to Push Through |
 |
 |
Under-crimping may cause leaks
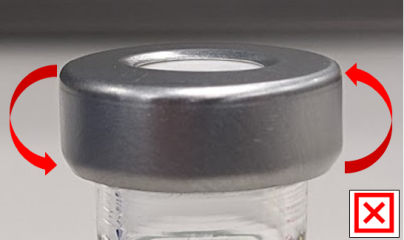
A cap that can still spin freely on the rim of the vial without any resistance, move up and down, or rock side to side after crimping is too loose and may allow volatiles to escape.
|
Cap spinning freely |
Cap moving up and down |
 |
 |
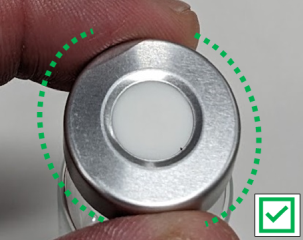
Verify a high-quality crimp
A high-quality crimp prevents leaks and is easily de-capped will still allow the cap to rotate on the rim of the vial with a moderate level of resistance.
Adjust the Crimper/De-Capper as Necessary
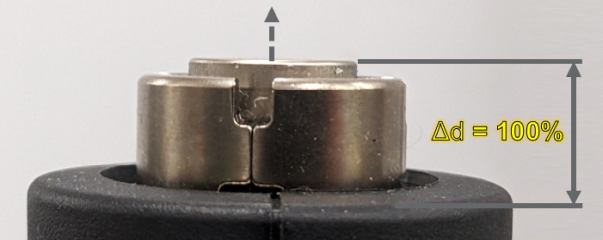
The percentage setting of crimpers/de-cappers is an adjustment of plunger displacement
The percentage setting changes the distance of the plunger’s stroke or it’s displacement as a percentage of the maximum.
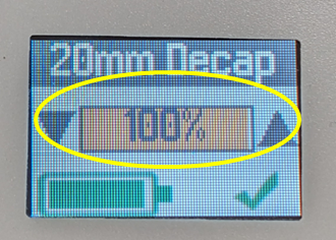
A 100% setpoint indicates maximum plunger displacement. It is not an adjustment of motor torque or force applied to the cap.
Crimpers/de-cappers always apply maximum torque but limit the distance that the cap is squeezed by the plunger.
 |
 |
The percentage setting of crimpers may require adjustment when changing parts
Different properties of different part numbers of any vial, cap, or septum may affect the percentage setting of the crimper.
Even small vial rim thickness, cap thickness, septum thickness, or septum hardness specification differences may require a small change to the percentage setting to maintain the best possible crimping quality.

The percentage setting of crimpers may require adjustment when changing lots
Even for the same part number: vial rims have a thickness tolerance, caps have a thickness tolerance, septa have a thickness tolerance, and septa have a hardness tolerance.
If these allowable tolerances vary slightly from lot to lot, the crimp percentage setting may require small changes to maintain the best possible crimping quality
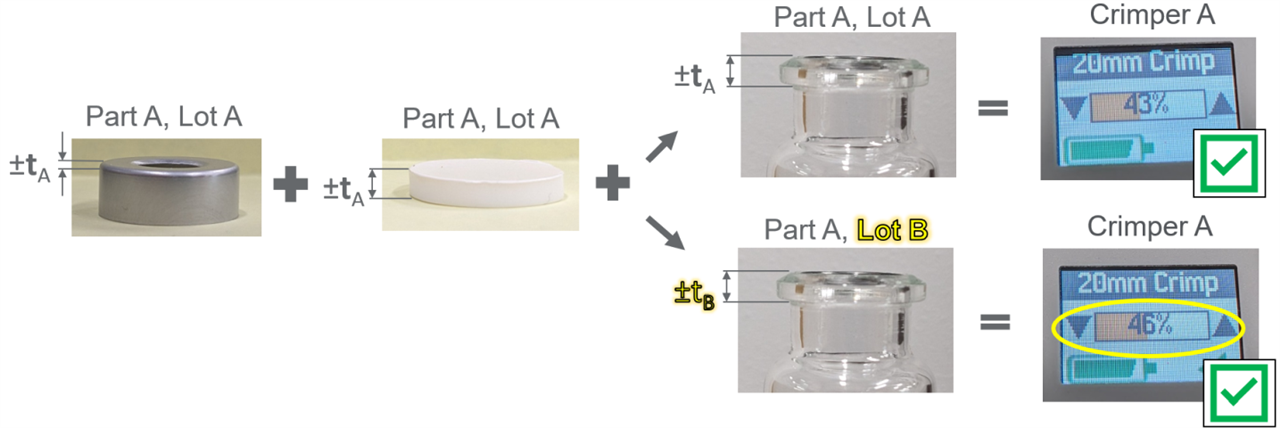
The percentage setting may require adjustment when changing crimpers
The percentage setting is not a value which is calibrated by the factory, so it may not be the exact same value for every crimper.
The percentage setting is not based on any empirical unit of measure. Tolerances of the crimper jaws and plunger mean that any two crimpers may require slightly different percentage settings to maintain the best possible crimping quality.
Each crimper’s own setpoint will remain precise and consistent over its lifetime.

Choose a percentage setting for crimpers near the center of the typical usable range
There is a range of percentage settings that provides a high-quality crimp for any given combination of parts, lots, or crimpers.
Choosing a setpoint near the middle overlapping region of those ranges will reduce the number of small adjustments that are required to consistently deliver high-quality crimps regardless of any variations that may occur.
If constantly crimping near the maximum amount, just short of over-crimping, then there will be no available margin to account for the possibility of the next lot of septa being at their maximum allowable thickness tolerance.

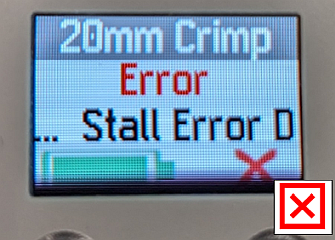
Check the percentage setting and the crimp quality after any “Stall Error”
The Agilent A-Line crimper has intelligent programming to abort the crimp before motor or gearbox damage could occur if a crimp percentage setting is far too high for the vial and cap being crimped.
If a “Stall Error” occurs, check the crimper’s percentage setting, the caps, and the vials for the cause of the error. When this error is seen, it is likely that something is already adversely affecting the crimper’s performance.
The percentage setting for de-cappers should always be set to 100%
There is no need to limit how far de-cappers will squeeze a used cap during removal.
Utilize all of the de-capper piston’s available displacement to have the greatest likelihood of successful cap removal.
