CUT&TAG fragment distribution

Hello,

I have analysed some samples from CUT&TAG previously with good results. However, now the results I obtained from the bioanalyser 2100 show a really strong signal (the optic signal too high error) as well as weird gels with even no markers. I have tried DNA extraction with phenol or with beads to see if any contaminant was the problem but the analysis obtained from the instrument is still not better. The samples are diluted in nuclease-free water. I have already redone the gel and changed the syringe in the priming station.

What else could be affecting the samples to obtain these strange results when it used to work previously, following the same protocol?
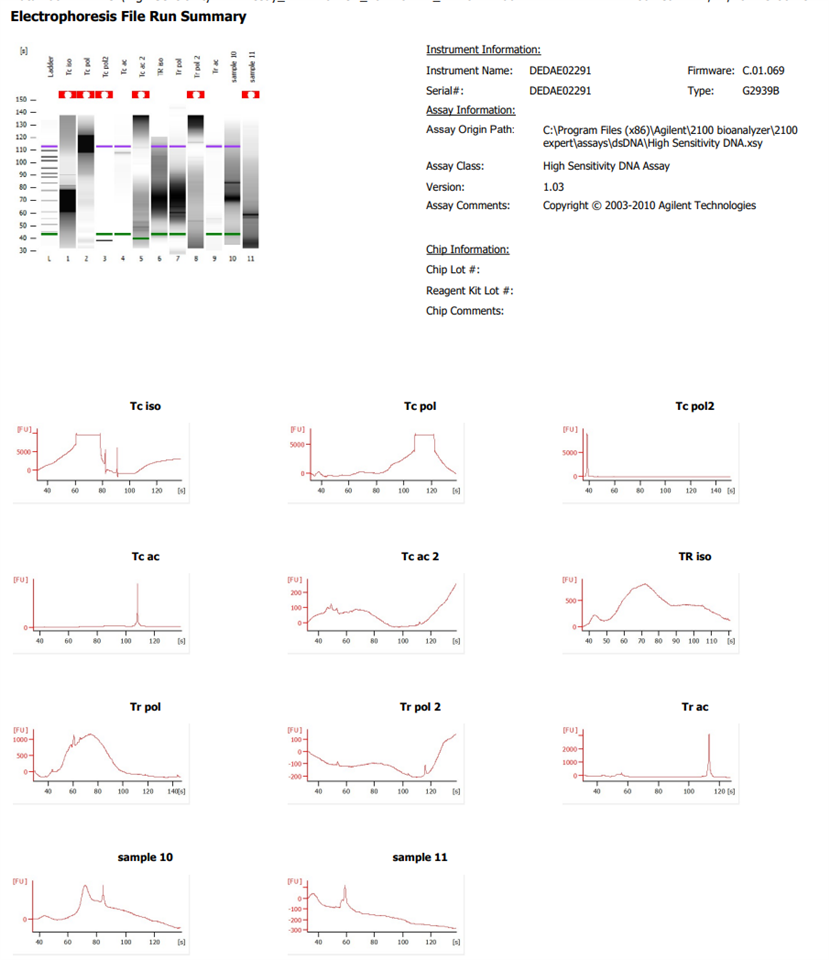
  • Thank you for contacting us. Please note that analyzing the raw data file that ends in .xad is more informative than the screenshot shared. However, based on the screenshot shared, the ladder appears to have run as expected, therefore indicating a potential sample-related issue such as high salt content in the sample or the sample is overloaded. What you’re seeing in the samples appear to be the wavy baseline symptom, which can be caused by several factors. More information on this is outlined in the article, ‘Wavy Baseline on the Agilent Bioanalyzer - Articles - Automated Electrophoresis Portal - Agilent Community’.

    Specifically, I would suggest the following:

    1. Ensure that the 1ul of sample added to the chip is in a buffer that does not exceed the maximum given in page 5 of the High Sensitivity DNA Kit Guide. High ionic strength of buffer can interfere with the assay.
    2. Dilute samples further to see if this helps. It is recommended that TE buffer be used to dilute samples when using the High Sensitivity DNA assay. The High Sensitivity DNA assay has a quantitative range of 5 – 500 pg/uL for DNA fragments and 0.1- 10 ng/ul for DNA smears. Exceeding the upper limit will result in the plateau-ing effect seen in the data.
    3. Clean the pin set of the electrode cartridge (page 121 of the Bioanalyzer Maintenance and Troubleshooting Guide). Here is a video that describes the process.
    4. In addition to replacing the syringe, I would suggest completing the full maintenance on the priming station such as replacing the syringe adapter and the gasket (page 131 and 132 of the Bioanalyzer Maintenance and Troubleshooting Guide). After replacing parts, please run the seal test on the priming station. Please see page 141 of the Maintenance and Troubleshooting Guide for the procedure. The syringe clip should be in the lowest position when running the seal test. When performing the seal test, ensure an empty/unused assay chip is used.
    5. Additionally, check the priming station settings as listed in the High Sensitivity DNA Kit Guide. It is important for the base plate to be in location C and the syringe clip to be in the lowest position. Additionally, when the chip is being primed, it is important to wait for 60 seconds before releasing the clip. Ensure the syringe plunger is extended out to the 1 mL mark BEFORE closing the priming station. When priming the chip, make sure you hear a click of the priming station lid when you are closing it over the chip.
    6. Please ensure that only 350 uL of water is added to the electrode cleaner, not more. Adding more or using a water bottle to squirt water in the electrode cleaner may overfill the cleaning chip and cause leak currents.

    If these recommendations still do not resolve the issue, then please follow the instructions on page 26 of the Bioanalyzer Maintenance and Troubleshooting Guide to perform hardware diagnostics. Then follow the instructions on page 21 to collect the support package. Then email the zipped data file along with the raw data files that end in .xad to your local support team which you can find here: Contact Us | Agilent

Was this helpful?