

Dissolution testing is labor intensive as well as a technique and time dependent analytical procedure. A typical dissolution workflow consists of several steps including dissolution media preparation, media filling, introducing the dosage form into the vessel, sampling, filtration, analysis, calculating the results, and generating final test reports. The incorporation of automated sampling can be a great way to save time as well as reduce the variables affecting the results.
In this two-part blog, I will discuss the merits of automated sampling in dissolution testing and how to properly perform validation of your sampling station or autosampler.
Part 1: Merits of Automated Sampling in Dissolution Testing
It is said that there are four primary sources for potential error in any process. They are identified as the four ‘M’s: -
- Man
- Method
- Machine
- Material
Any investigation resulting from a failed dissolution test would look at these four areas. I will discuss here the typical dissolution workflow and how automated sampling can help eliminate variables - our four ‘M’s - associated with dissolution testing.
The following table compares the typical workflow for manual vs. automated tasks:
|
Task |
Manual Sampling |
Automated Sampling |
Variable / Risk (with Manual) |
|
Test Preparation |
Perform pre-operational checks to ensure that the apparatus is in good working condition. Prepare, measure, and dispense media in the vessels. Allow the media to attain the required temperature and stabilize. Program the required test parameters in the apparatus. |
Perform pre-operational checks to ensure that the apparatus is in good working condition, fill the sample tray with adequate test tubes or vials. Prepare, measure, and dispense media in the vessels. Allow the media to reach the required temperature and stabilize. Load the automated program saved in the autosampler. |
Load the improper parameter for the dissolution method (e.g., wrong rpm or time points). |
|
Starting the Test |
Record the vessel temperatures before starting the test. Drop the dosage or lower the baskets and start the rotation of the shaft to initialize the test. |
The autosampler will monitor the bath and vessel temperature before the start of the test. Once the temperature is achieved, the dosage form will be dropped in the vessel, or the analyst will be prompted to lower the basket. Shafts will start rotating automatically. |
Forgetting to record vessel temperatures before test start. Inconsistent dropping of dosage forms or dropping into already rotating media. |
|
The Dissolution Test |
Withdraw and filter samples at specified time points manually within the ±2% time limit. Perform replacement of media with each sampling point if necessary. |
Samples automatically withdrawn at programmed sampling points at a consistent location within the specified time limits. Samples automatically filtered immediately after they are withdrawn. Optional media replacement may be performed automatically by autosampler. |
Samples withdrawn at times outside of USP time specification (+/- 2%) or improper location depending on analyst variability. Samples not filtered immediately after sampling (outside of USP timing window). Improper volume replaced, if applicable |
|
Sample Collection & Analysis |
Collect filtered samples into test tubes or vials. Analyze samples using UV-Vis or HPLC analysis. |
Samples automatically collected into test tubes or vials. Analyze samples using UV-Vis or HPLC analysis - online UV-Vis analysis provides real-time analysis and feedback to the user. |
Improper sample volume withdrawn/collected affecting final calculations and results. Incorrect analytical method or parameters used. |
|
Cleanup |
Clean the apparatus (e.g., empty and rinse vessels) and accessories/components used during the test. |
Clean the apparatus (e.g., empty and rinse vessels) and sampling cannulas. The autosampler can clean the lines itself right after completion of the dissolution run. |
Apparatus or accessories are not sufficiently cleaned according to the validated cleaning method for each product. System components not cleaned immediately after use allowing residual material to dry or crystallize. |
So, when we are introducing automation into the sampling portion of the dissolution workflow, we can maximize the output with minimum errors and variations. An automated program can be created and saved with dissolution parameters for the specific product. Administrative privileges ensure that only an analyst with proper security level can create, save, and edit these in sampling station or dissolution software database. This greatly reduces the scope of a potential failure investigation since the automated system performed many of these functions with no variability.
We can achieve the following by incorporating automated sampling:
- Improved accuracy
- Dosage form is introduced into the vessel and sampling done within the USP time limit.
- Samples automatically collected, filtered, and stored correctly in sampling trays.
- Improved precision
- Sampling done at the proper height and distance each time.
- Precise volume withdrawn and/or replaced in the vessel each time.
- Enhanced productivity
- Modified and extended-release products may require user intervention outside of normal working hours. This can be alleviated with an automated sampling station.
- Analyst can focus on the other laboratory tasks like standard preparation, preparing the UV-Vis or LC for analysis, or data review.
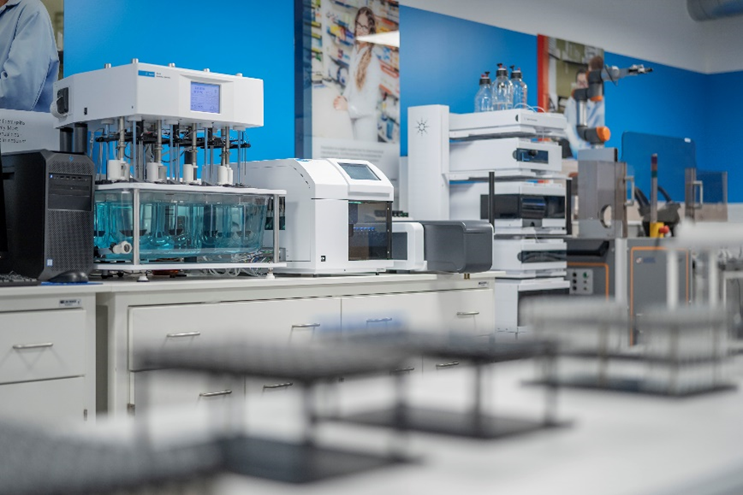
An Example Workflow using the Automated Dissolution system from Agilent
The Agilent 708-DS dissolution apparatus and 850-DS sampling station can be used to perform several automated functions. The 850-DS has a variety of sampling trays, from test tubes to HPLC vials and even 96-well plates. It has an interactive touchscreen that can be used to control all the parameters of the dissolution system.
The Agilent 708-DS automated sampling manifold is lowered precisely to the specified sampling location each time a sample is withdrawn.
A typical automated dissolution workflow using the 708-DS and 850-DS sampling station looks like the following:
- Prepare the dissolution media, measure, and dispense in the vessel. Load the automated program saved in the 850-DS sampling station database.
- The 850-DS will record the initial vessel temperatures and drop the dosage forms by triggering the DDMs (dosage delivery modules) or prompt the analyst to load the basket and begin the test. Rotation of the shafts will start automatically when the 708-DS is lowered into position.
- At specified sampling points, the automated sampling probes will descend to the exact depth according to the volume of dissolution media and apparatus installed (midway between the top of the paddle/basket and the surface of the media).
- The 850-DS pump will prime the lines and then collect samples at the specified time points. The probes will return to their original (elevated) position and any remaining media in the lines will be purged back into the vessel. Pre-heated media can be replaced if required as part of the method.
- Samples will be filtered immediately by full flow cannula filters or, if applicable, the 850-DS filtration module and stored in the test tubes/HPLC vials.
- The 850-DS will itself perform cleaning of lines and cannulas after completion of the dissolution run.
I hope you enjoyed reading this overview of the advantages that automated sampling can provide in the dissolution workflow. For more information, you can read the article from Dissolution Technologies titled "Considerations for Automating the Dissolution Test".
In the next blog, I will further discuss this topic, specifically about how to perform validation of an automated dissolution system. Thank you for reading and stay tuned!